
Clarify Technical Services - Tip #10
Setting up Remote access via VPN for Clarify Technical Services support.
Applies to: Microsoft Windows, All current versions.
Last updated: Wednesday March 12, 2014
SUMMARY:
These are the instructions you will need in order to set up your PC for remote technical support by Clarify Technical Services.
What you will need and where to get it:
You will need to install Logmein Hamachi VPN software for secure remote access as well as TightVNC remote control software.
LogmeIn Hamachi VPN Software: hamachi.msi V2.2.0.173 (7.8 MB) Last updated: March 12, 2014.
TightVNC Remote Access software 32bit: tightvnc-2.7.10-setup-32bit.msi (2.0 MB) Last updated: March 12, 2014.
TightVNC Remote Access software 64bit: tightvnc-2.7.10-setup-64bit.msi (2.3 MB) Last updated: March 12, 2014.
Installing and seting up the software:
32 or 64 bit Windows?:
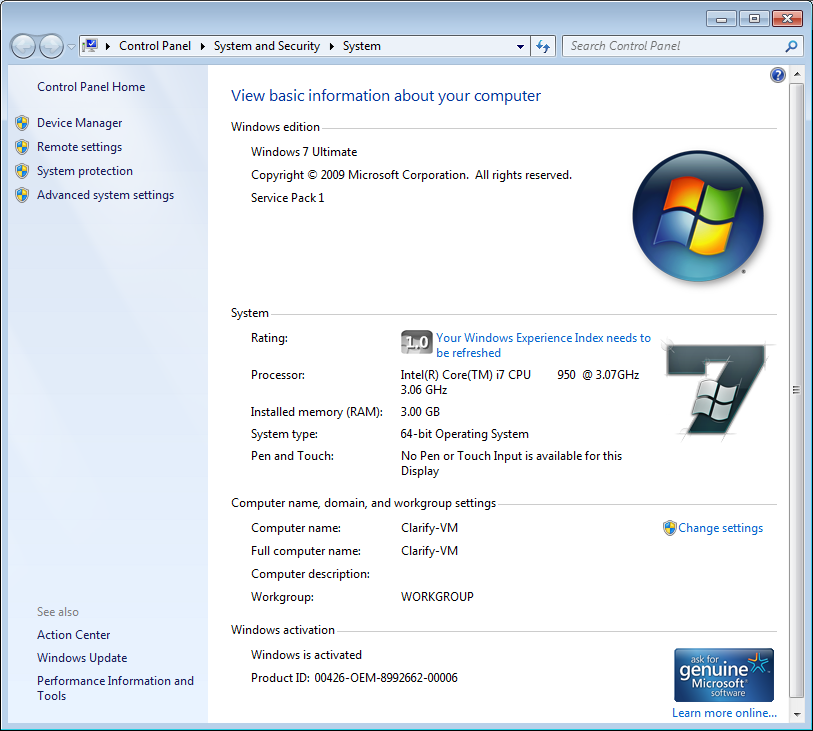
We need to determine if you are running 32 bit or 64 bit Windows. Click the start button and right click on "My Computer" and select "Properties". This will open a screen showing some details about you system. Under the heading "System" you will see "System type" as "32-bit Operating System" or "64-bit Operating System" This will determine if you need the 32 bit installer or the 64 bit installer for Tight VNC.
Hamachi VPN:
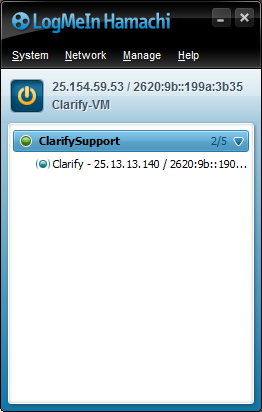
Run hamachi.msi. When asked "Do you want to run this file?" click "Run". On the Language Selection screen click "next". On the next LogMeIn Setup screen, just click "next". You will now see the License agreement. Just click "I Agree". On the "Choose Install Options" window, leave all the defaults and click "Install". If you see the "User Account Control" prompt, click "Yes" to allow the program to install. You will now see a window saying LogMeIn Hamachi Setup Complete. Just click "Finish" LogMeIn Hamachi will now launch. You will now see the LogMeIn Hamachi screen. There is an orange arrow pointing to what looks like a power button. Beside the button it says 0.0.0.0 offline. Click on the power button. On the "Register this client" screen, enter a client name which will identify you such as "Deb" then click "Create" You will get the "Set Network Location" screen for this connection. Select "Work network". Then click "Close". You are now back at the LogMeIn Hamachi screen. Click "Join an existing network". enter "ClarifySupport" as the network name and the password I sent you by email. Then click "Join" You will now see that you are online in the ClarifySupport VPN and you may also see other clients listed. This is normal. You are now done installing and setting up the VPN software.
Tight VNC Remote access software:
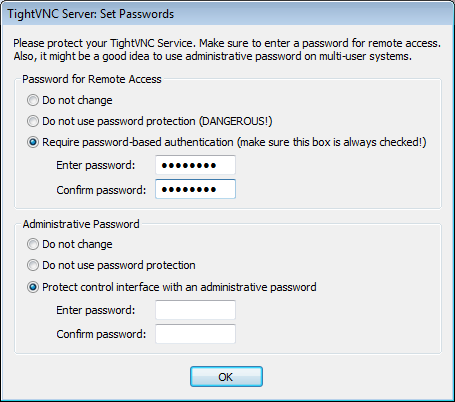
Select either the 32bit.msi file or the 64bit.msi file for your operating system and run it. When asked "Do you want to run this file?" click "Run". On the "Welcome to the TightVNC Setup Wizzard" screen, Click "Next" At the "End-User License Agreement" screen, check the box at the bottom for "I accept the terms . . ." and then click "Next". On the "Choose Setup Type" screen, select "Typical". On the Select Additional Tasks" screen, leave all the defaults and click "Next". On the "Ready to install TightVNC" screen, click "Install". If you see the "User Account Control" prompt, click "Yes" to allow the program to install. When prompted to set TightVNC server passwords, set the remote access password to the one I sent you via email. Under the administrative password, chech the button for Do not use password protection. Then click "OK" You will now see the "Completed the TightVNC Setup Wizzard". Click "Finish".
Allowing access throught the Windows Firewall:
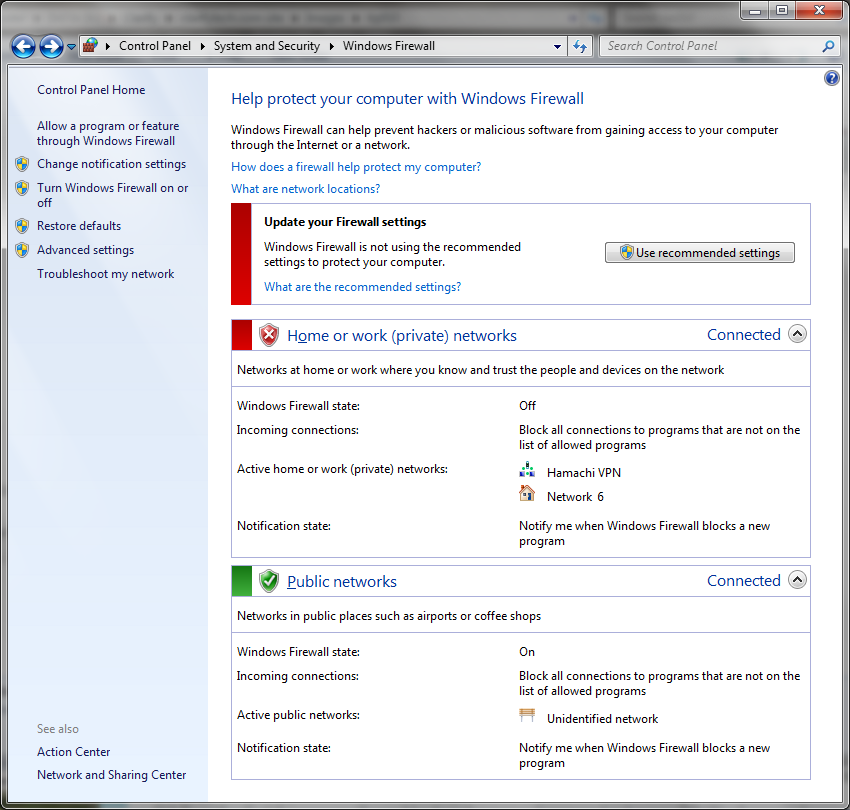
In order to allow access from the internet, we will need to temporarily disable the Windows firewall. To turn it off, follow the instructions below. Once I have been able to log in remotely, I can set the networking permisions to allow TightVNC out through the firewall and re-enable it for you.
Click "Start" and select "Control Panel" Select "System and Security" Next select "Windows Firewall" In the menu on the left, you will see the option "Turn WIndows Firewall on or off". Click it. Under the "Home or work (private) . . ." section, check the button "Turn off Windows Firewall (not recommended)". Then click "OK".

And finally:
Once this is all done I will be able to login remotely to work on your PC. Once I have completed the work, You can open the Hamachi program, Right click on the "ClarifySupport" network and select "Go Offline". This will disconnect you from the Hamachi VPN network so nobody including me can access your systm.